Creating a VPS instance
Before you can create a virtual private server (VPS), you have to have a web hosting account. I fully stand behind Vultr hosting (have you seen my site’s sidebar?), so if you still need a web host, head over to Vultr and sign up for an account. If you sign up for Vultr with one of the links from my website, you get $100 in free credit to try out the platform (full disclosure: I also get a small fee once you’ve been a paying member for awhile, at no additional cost to you).
Registering for Vultr
First, head over to Vultr and sign up for an account. Once you have entered your email address and password, click “Create Account”. You should be redirected to the account billing dashboard.
In order to get your $100 in free credit, you do need to link a valid credit card to your account – but you aren’t charged for anything! On the Billing page, enter your credit card information and then tick the box that says “I just want to link my credit card – $0 deposit“. Tick the next box to agree to the terms of service and then click “Link Credit Card”. Congratulations! You just got $100 in free credit to try out the platform. You won’t use nearly that much in a month unless you’re hosting an enterprise site (or dozens of smaller sites) so your first month will almost certainly be free. The $100 credit expires after 30 days though, so don’t be shy about using what you can at first.
Spinning up a virtual machine
Once you have an account and you’ve redeemed your $100 initial credit, you can add a virtual machine.
- In your Vultr account, navigate to the Products page and click the blue plus icon on the right. This will bring up the Deploy Servers page, where you select the kind of virtual machine you want to create.
- For the instance type, choose Cloud Compute.
- For the server location, choose a location that is geographically nearby.
- For the server type, choose Ubuntu 20.04
- For server size, choose whatever you like. I recommend the $5 instance to start, and you can scale this up if you need to later
- For additional features, leave these blank for now
- For startup script, leave this blank
- For SSH keys, leave this blank
- For firewall group, select No Firewall
- For server hostname and label, you can choose whatever you like here. If you intend to use this server for a website, it makes sense to use the domain of the website here (but you don’t have to if you don’t want to)
- Click Deploy Now
Congratulations on your new VPS instance! Once you have deployed your new VPS, you will be redirected back to the Products page. Your new server will show up in the server list at the bottom of the page. It won’t be accessible for several minutes because the VPS has to install the operating system on the instance first. You can see whether your server is ready by checking its status on the far right of the server list table: Once your VPS is ready, its status will change to “Running”.
Accessing your new VPS instance
On the product page, once your server’s status is listed as “Running”, you can log in to your server. The easiest way to do this will be through the provided web console.
Start by clicking on your server’s name in the server list. This will take you to the server management page. Before you can log in to your new server, you need the administrator user and password, which can be found at the bottom-left of this page. Your username is most likely “root”, and your password will be a long, random string of characters. Make note of these, then click the monitor icon near the top-right of the page (when you hover over the correct icon, it should say “View Console”).
In the popup window that appears, you will see an old-school text input terminal, commonly referred to as a “command line”. The command line will most likely be prompting you for your login information, but you may see other output as well. If you see something like this:
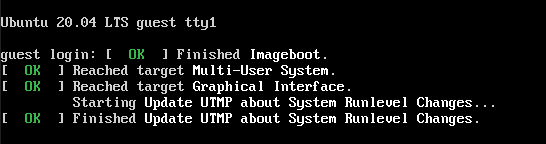
don’t worry about it. Just hit “enter” or “return” on the console and it will proceed to a new line. Sometimes, command line output continues after the login screen is printed, and that’s all that happened here. As long as the printing has stopped you can safely hit enter to get a new login prompt.
Now enter your username and password. Your password may be tricky to get right, but it will get easier in a minute because the first thing we’re going to do is create a new user.
Why create a new user?
It’s considered bad practice to run a public machine using only the root account. In Unix systems, root is the username of the administrator account, and a Unix tradition is to only give users the permissions they need to be able to do their job. root is able to do anything it wants without question, and this is very bad in general, so our first order of business is to create a new user and grant it administrator privileges – that way we can still do what we need, but most of what we do will be done as a regular old user. It’s safer for the system to use a user that isn’t root, even if that user can do things as an administrator.
To create a new user in Ubuntu, type the following into the console and replace your_new_username with the username you want to use, followed by Enter:
adduser your_new_usernameSeveral lines will be printed to the screen, and then you will be prompted to create a password for your new user account. This new password should still be secure, but feel free to make it easier to remember than your default root password! Re-enter the new password when prompted, then press Enter to accept the defaults for the rest of the prompts (these are unimportant).
If no errors occurred, you are almost ready to start using your new user account. You just need to grant your new user administrator privileges, and then you can stop using the root account for good if you want. To grant administrator privileges in Ubuntu, type the following into the console and replace your_username with the username you chose in the previous step:
usermod -a -G sudo your_usernameWhat this command does is adds the your_username user to the user group sudo. In Linux, user groups can serve a number of purposes, but in this case, the group sudo is used to identify users that have permission to perform administrative tasks. The usermod command requires administrator privileges to run, so users can’t grant themselves administrator privileges.
Now, all that’s left to do is to make sure that your new user account works. To log out of a command line, simply type:
exitYou will be returned to the login screen at this point. Now, instead of logging in with the root account, try to log in with the user account you just created for yourself. If everything worked properly, a welcome message should print to the screen.
Congratulations! Now you’re ready to start setting up your new web server.