Installing and configuring PHP
Brace yourself...again
If you’re still mentally worn out from the last lesson, you will probably want to take a break. This lesson is going to be just as complicated, so you will want to go in with a clear head.
What is PHP, exactly?
PHP is a website scripting language. It’s used to add advanced functionality to websites, like login systems or e-commerce platforms. PHP isn’t the only solution for adding these functionalities, but it is the simplest and the most popular.
If your website runs on PHP, you need to install PHP on your server in order for your website to work. However, this is no small task because PHP was built in a modular fashion – you don’t just download PHP and install it like a normal program, you have to download many different parts in order for your website to work properly.
Installing PHP
Installing PHP is going to be a little more typing-intensive than the other installations we’ve done so far, because you don’t just install a single package – you actually install about a dozen. Before we begin, let’s go ahead and (all together, now!) make sure your server is running the latest version of its software!
sudo apt update
sudo apt upgrade -y
Before we proceed, we need to install a helpful little program. Run this command:
sudo apt install -y software-properties-commonI’ll explain what we just did in a moment.
Now, before we actually install PHP, we need to talk for a minute about APT software repositories. A software repository is a location where users can publish software. (A lot of us software developers actually work for free for the betterment of the community as a whole. Many excellent developers contribute their efforts at no cost to enrich the experiences of the rest of us.) Ubuntu gives you access to the most commonly used repositories by default, but you can give yourself access to other public repositories. Ordinarily, this would involve manually editing files to include additional repository locations, but a moment ago we installed the software-properties-common package, which gives us access to the add-apt-repository command. The add-apt-repository command allows us to add software repositories in a more intuitive manner.
Ubuntu usually has decently recent versions of software available, but they usually don’t have the latest and greatest. For PHP development, Ubuntu often doesn’t cut it on this front. Fortunately, a trusted member of the community keeps the latest versions of PHP available for users to install on their Ubuntu servers. We need to add his repository to our server’s repository list with this command:
sudo add-apt-repository -y ppa:ondrej/phpNow that we have the latest PHP software available to us, we can go ahead and install PHP. You have two choices for this installation command. You can either install the packages all at once like I show you, or you can run sudo apt install ... for each individual package, one at a time. The choice is yours. I, however, will show you the all-at-once command. To install PHP, run:
sudo apt install -y php7.4-common php7.4-fpm php7.4-mysql php7.4-xml php7.4-xmlrpc php7.4-curl php7.4-gd php7.4-imagick php7.4-cli php7.4-dev php7.4-imap php7.4-mbstring php7.4-opcache php7.4-soap php7.4-zip php7.4-intlThat’s a lot to install, so this will probably take a few minutes. My installation appeared to hang at about 98% for about a minute, but this happens from time to time – especially when installing large packages or a large number of packages. The total installation was over 300MB for me.
Configuring PHP
Now that PHP is installed, we need to make sure that it’s always available, just like we’ve done with MySQL and Nginx. Start PHP and enable it as a service with the following commands:
sudo systemctl start php7.4-fpm
sudo systemctl enable php7.4-fpm
Setting Nginx up to use PHP
Next, we need to add a few lines to the main Nginx configuration file. These lines will tell Nginx how to pass requests off to the PHP FastCGI Process Manager, which is one of the programs we just installed (php7.4-fpm). To edit this file, enter this command:
sudo nano /etc/nginx/nginx.confThis will open the Nano text editor and allow editing the Nginx configuration. The Nginx configuration file looks a lot like this by default (comments have been removed for brevity):
user www-data;
worker_processes auto;
pid /run/nginx.pid;
include /etc/nginx/modules-enabled/*.conf;

events {
        worker_connections 768;
        # multi_accept on;
}

http {
        sendfile on;
        tcp_nopush on;
        tcp_nodelay on;
        keepalive_timeout 65;
        types_hash_max_size 2048;

        include /etc/nginx/mime.types;
        default_type application/octet-stream;

        ssl_protocols TLSv1 TLSv1.1 TLSv1.2 TLSv1.3; # Dropping SSLv3, ref: POO>
        ssl_prefer_server_ciphers on;

        access_log /var/log/nginx/access.log;
        error_log /var/log/nginx/error.log;

        gzip on;

        include /etc/nginx/conf.d/*.conf;
        include /etc/nginx/sites-enabled/*;
}
To make the modification we want, move the cursor above the second-to-last line, include /etc/nginx/conf.d/*.conf. Press Enter a few times to empty up some space above this line, and in the empty space, add this configuration block:
upstream php {
     server unix:/run/php/php7.4-fpm.sock;
}
This tells Nginx how to contact the PHP FastCGI Process Manager. Press Ctrl+X to exit, then y and Enter to save the changes.
Next, we will tell Nginx how to serve our website. This is going to live in a different configuration file. Run this command to set up our website:
sudo nano /etc/nginx/sites-enabled/defaultThis configuration file is going to look similar to the one we just saw. However, the previous file (nginx.conf) configured the entire web server. This file only configures the default website for the web server, and it looks something like this (most comments have been removed):
server {
        listen 80 default_server;
        listen [::]:80 default_server;

        root /var/www/html;

        # Add index.php to the list if you are using PHP
        index index.html index.htm index.nginx-debian.html;

        server_name _;

        location / {
                # First attempt to serve request as file, then
                # as directory, then fall back to displaying a 404.
                try_files $uri $uri/ =404;
        }

        # pass PHP scripts to FastCGI server
        #
        #location ~ \.php$ {
        #       include snippets/fastcgi-php.conf;
        #
        #       # With php-fpm (or other unix sockets):
        #       fastcgi_pass unix:/var/run/php/php7.4-fpm.sock;
        #       # With php-cgi (or other tcp sockets):
        #       fastcgi_pass 127.0.0.1:9000;
        #}
}
Nginx actually has almost everything we need right here. We just need to clean it up. Near the bottom, clean up the block that starts with #location ~\.php$ {. Remove some of the leading # symbols and delete lines that are only comments. Also, delete one of the fastcgi_pass lines and change the other one to read fastcgi_pass php. When you’re done, that section should look like this:
location ~ \.php$ {
       include snippets/fastcgi-php.conf;
       fastcgi_pass php;
}
Further up from that is a block that starts with location / {. In that is a line that reads try_files $uri $uri/ =404;. Change that line to read:
try_files $uri $uri/ /index.php?$args;Also, change the line that says index several times so that it looks like this:
index index.php;Finally, change the line that starts with root to read this, replacing your_site_name with the name of your website (feel free to include the .com portion of your website, this is perfectly acceptable):
root /var/www/your_site_name/public;What did we just do?
We have just done four things.
- We told Nginx how to handle PHP files. Any time our site receives a request for a file ending in
.php, it will pass the request off to thephpupstream block we defined innginx.confearlier. - We told Nginx how to handle file requests at the generic
/location (/is valid for your entire site). Thetry_filesrule tells Nginx to try a certain list of patterns, falling back to the last pattern if all others fail. Here, we are telling Nginx to first try to serve the requested URI exactly as it came in. If that doesn’t work, we’re telling Nginx to then try serving the requested URI as if it was a request for a directory. Finally, we’re telling Nginx to serve the mainindex.phpfile in our document root. This last rule enables WordPress to use fake URLs (this page, for example, points tochristianspeegle.com/backend/wordpress-hosting/installing-and-configuring-php, which would not be a real URL on my server if I used WordPress – instead, WordPress would use the URL to decide what page it should serve based on the provided categories and post name) - We told Nginx that anytime it receives a request for a directory instead of a file, it should serve the
index.phpfile in that directory. - We told Nginx that our site’s files live in the directory
/var/www/your_site_name/public
Now, Nginx has been configured. Before we test the configuration, however, we need to create the directory that you specified as the root of your website. Do so by entering this command, replacing your_site_name with the name you used for your website in the configuration file:
sudo mkdir -p /var/www/your_site_name/publicThe mkdir command is used to create a new directory. The -p flag tells mkdir to make any and all directories in the path that don’t exist; otherwise, you would have to run mkdir twice to make the directories we just created: once to create /var/www/your_site_name and again to make /var/www/your_site_name/public. But since we used the -p flag, mkdir knew to go ahead and create /var/www/your_site_name when it saw that it didn’t exist before trying to make the public directory within.
Now that the directory actually exists, we can test our Nginx configuration. To do this, we don’t actually need to restart Nginx because Nginx has a built-in utility that will test our configuration for us. This is useful because it means we can check whether our configuration contains a mistake without actually shutting our webserver down and risking downtime. To test the Nginx configuration, run this command:
sudo nginx -tIf there were any problems in your configuration, the text utility will say so. If there are errors, make sure that everything was copied into the files exactly as printed on this page. Make sure that each configuration line ends with a semicolon.
Once your configuration is working, restart Nginx by running:
sudo systemctl reload nginxTesting our configuration
Now, we get to test whether our new PHP configuration is working properly. To do that, we will create a simple PHP script in the website’s document root and then try to visit our server in a web browser to see what happens. Create a PHP script in your document root with this command, replacing your_website_name with your website name as you recorded it in the Nginx configuration:
sudo nano /var/www/your_website_name/public/index.phpThis opens Nano once again, this time to create an entirely new file. Enter this code into the file exactly as it is shown here:
<?php
phpinfo();
Exit the file with Ctrl+X and save the modifications with y and Enter. Now, try to visit your web server’s IP address in a web browser, and you should see something similar to this:
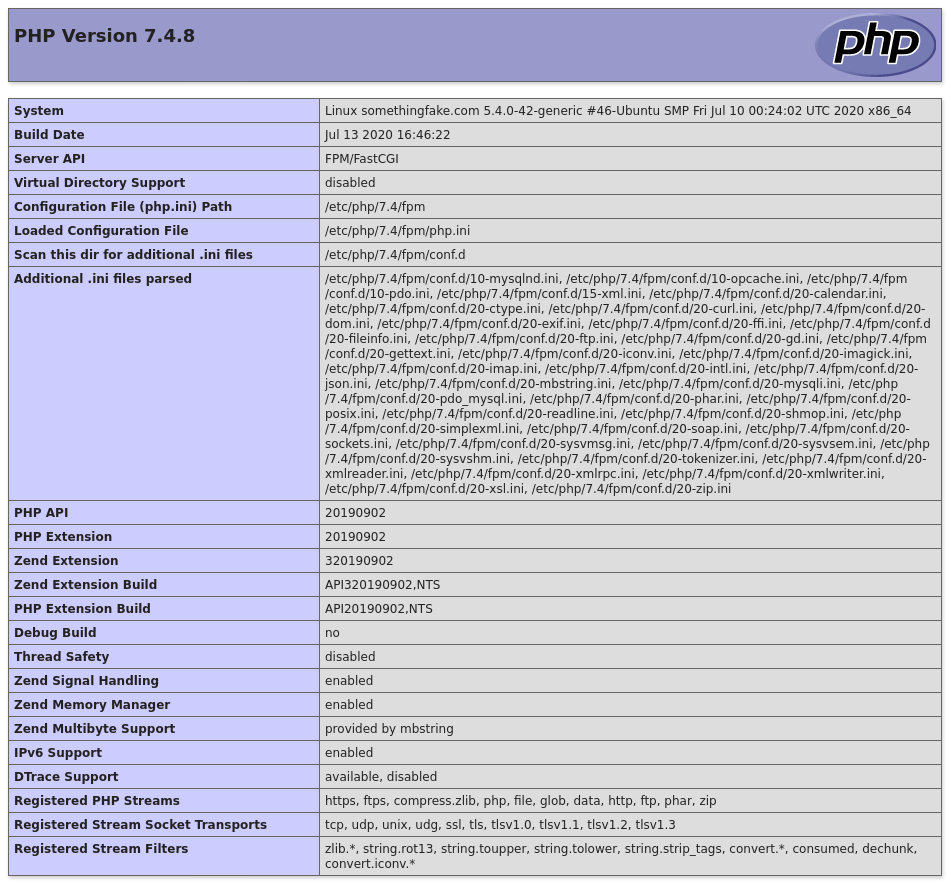
If you see the image above when you access your web server, congratulations! You’re ready to move on to the next step in the process, which is uploading your WordPress files into your web server.