Setting up a web server
Wait a minute. I thought I already had a web server!
Well…you do. This is really the tech community’s fault for allowing this ambiguity in the first place. Your VPS is, technically, a web server. Its purpose is to serve websites, after all. However, each web server has a separate program running, also called a web server. The web server program is there to actually serve files based on incoming requests. Your web server has a web server running on it. Very meta.
Web server software
There are many web server programs in the world, but only a few have widespread usage, primarily Apache, Nginx (“engine-x”), and IIS (Internet Information Services). IIS runs exclusively on Windows servers, so that leaves us with two main choices. Of the two, I prefer Nginx, but both servers are widely used and capable.
How Nginx works
Nginx is a small, simple web server that listens for website requests. You set Nginx up using configuration files, and Nginx uses those configuration files to determine how to honor requests for a website. Nginx’s main philosophy of design is to essentially hand each request off as quickly as possible, allowing Nginx to hypothetically handle thousands of concurrent connections. If web servers were vacations, Nginx would be a brochure kiosk; if you ask about a particular attraction (a resource a client is requesting from the server), Nginx hands you a brochure and sends you on your way (it either serves the file or hands the request off to another process for fulfillment).
Some requests are for static files like images or HTML pages, and Nginx will pass those files along. Other requests are for PHP scripts, and Nginx will forward those requests to a PHP processor. Sometimes, Nginx doesn’t know what to do, and in those cases, you can tell Nginx how to respond. You can base Nginx rules on all sorts of factors, including things like file type and URI matching. You can instruct Nginx to compress responses to reduce data transfer sizes. There is an entire website dedicated to documenting the myriad ways Nginx can be used; if you find this tutorial more interesting than tedious, you can learn more at the Nginx documentation website.
How Apache works
Apache is a larger web server. It works the same way as Nginx in theory – you use configuration files to set up Apache, and you even use most of the same sort of information to instruct Apache how to serve websites. But where Nginx is like a brochure kiosk, Apache is more like a tour guide: If you ask Apache about a local attraction, Apache will personally take you to that attraction and tell you all about it.
Apache doesn’t typically pass requests off to other services the way Nginx does. Rather, Apache prefers to handle the entire request pipeline itself. For example, Nginx passes PHP scripts off to a separate FastCGI process, but Apache handles PHP scripts itself. Apache and Nginx have nearly identical capabilities, but they work in fundamentally different ways. Which server to use largely falls to developer preference in most cases.
Installing and configuring Nginx
As I said, Nginx and Apache are both fine web servers that are perfectly capable of hosting a variety of websites. My personal preference falls to Nginx, and I have more experience with Nginx of the two, so I will show you how to set up Nginx to host your site here.
To start with, make sure you’re still logged in to the command line for your server (if you’re not, follow the instructions from the previous article to log in to your non-root account). Once you’re logged in, we need to start by making sure your server is running the latest versions of its software. This is a general best practice when maintaining your own web server.
Updating your server’s software is a two-step process. Both involve use of the apt command, which is a package manager for Ubuntu’s software. First you need to update your list of available packages so your server knows what versions of installed software are available. Then, you need to actually update the software with a separate command. To update the package list, run this command:
apt updateWhat will happen is, nothing. Well, more specifically, you will get an intimidating-looking error about locking directories and unlinking files. I had you run this command incorrectly the first time because I want you to see the utility of having a non-root account to manage your server. If you had run this command as root, the web server would have done what you wanted without question. But since you’re not root, the web server requires you to use a special prefix for administrator-level commands: sudo (“soo-doo”, meaning “superuser do”, or “take this action with superuser privileges”).
Unix systems require this extra step for a variety of reasons, including ensuring that the person entering commands is aware of the elevated risk associated with the command they’re executing. On Linux computers, administrators can literally wipe the hard drive with a stray command, so great care must be taken when performing administrator tasks. Requiring the sudo prefix involves the user acknowledging the danger of their action. (If you recall from the previous article, you added your user account to the sudo user group – this is what enables a user to run commands as an administrator with the sudo prefix.)
All this being said, repeat the command with the sudo prefix:
sudo apt updateYou will be asked for your password as an additional precaution. Enter your password to confirm the command, and several lines of text will be printed to the screen, followed by information about how many packages can be upgraded. When the package list update is complete, the last line of the console will return to looking something like this:
your_username@your_hostname:~$ _This indicates that the command line is ready to accept commands again. If any upgrades are available, you should install them. To do this, run the following command:
sudo apt upgradeYou will notice that the command line does not ask for your password again; you only need to confirm your password every 15 minutes by default. Several more lines will be printed to the screen, including a confirmation asking if you wish to continue. Type y into the prompt and hit Enter, and then your server will download the software updates that are available and install them. This process is incredibly verbose; usually, you don’t need to concern yourself with the output unless errors occur. There were likely several hundred megabytes of updates that needed downloading and installing, so this can take quite some time. There may be times when the update seems to have frozen, but it probably hasn’t – sometimes, the process simply takes a very long time, so feel free to stretch your legs and grab a cup of coffee.
Once the upgrade is done, you may need to restart your server instance. (If you do need to restart, the last few lines of output will say so.) If you need to restart your server, you may do so with this command:
shutdown -r nowThis command does three things:
- Tells the server to shut down with the
shutdowncommand - Tells the server to restart after shutdown with the
-rflag - Tells the server to initiate the shutdown immediately with the
nowsubcommand (ordinarily, theshutdowncommand starts a 60 second countdown during which the shutdown can be cancelled by the user)
If you had to restart your server, log back in to your non-root user account as soon as the machine reboots, which should only take a few seconds. Once you’re ready to continue, you can install Nginx by running the following command:
sudo apt install -y nginxYou may notice that this time, apt doesn’t ask you if you want to proceed with the installation – it just goes ahead and starts installing. You may also have noticed that the install command was accompanied by a new flag, -y. The -y flag tells apt to assume that the answer to any questions arising from a command should be “yes”. Use of the -y flag is completely optional, but it can be useful if you want to skip the extra prompt.
Once Nginx has been installed, we’re ready to proceed, but before we do, we need a little more background for our next command. In computer systems, there are dozens of programs running in the background at any given time. These programs are known as “services”, and services can do any number of things. On Windows machines, for example, there is a service that checks for system updates. Windows 10 forces system updates and there is no way to disable this feature…unless you are familiar with the concept of services. Windows 10 uses a dedicated service to check for system updates, and a system administrator can manually disable that service. Once disabled, Windows will never force you to take an update because Windows never becomes aware of any available updates.
Essentially, Nginx is classified as a service. We want to set Nginx up to run any time the system starts up so we don’t have to manually start Nginx when the server restarts. The server may unexpectedly restart, for example following a power outage, and then your website will be down until you log in to your server and manually start Nginx again. By setting Nginx up as a “startup service”, Nginx will start automatically each time the server boots. On Ubuntu, you interact with services via the systemctl command, and most functions involving services require sudo privileges (you may check the status of a service without sudo privileges, but starting, stopping, reloading, enabling, and disabling services all require sudo). To designate Nginx a startup service, run this command:
sudo systemctl enable nginxNow, Nginx will be started along with other startup services each time the server fires up.
Before we continue, we can test whether Nginx is working properly by trying to access our web server. On your Vultr account page, go to the Products tab and look at your list of servers. At the bottom left of the entry for your web server, you will see a line that looks something like this:
1024 MB Cloud Compute - 12.34.56.78The four numbers separated by periods make up what is called an internet protocol address, or IP address. On a network, every computer has a unique IP address. This number serves the same purpose as your home street address – it allows network traffic to tell the difference between your computer and your coworker’s. If you click on the IP address listed for your server instance, the Vultr website will automatically copy the IP address onto your clipboard. Open a browser tab, paste the IP address into the address bar, and hit Enter. The page that loads should look something like this:
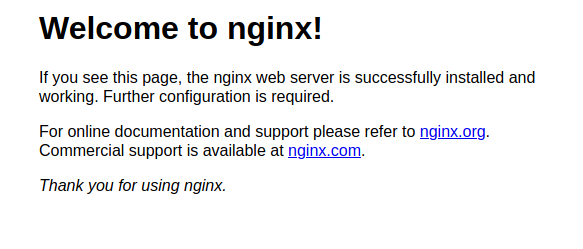
If everything is working so far, proceed on to the next article, where we will set up the database for your WordPress site.