Creating the Request Header Parser Microservice
Now we have enough information to complete the Request Header Parser Microservice! To begin with, let's create a data model to represent the request headers to send as JSON.
RequestHeaders POCO
If you're familiar with Model-View-Controller architecture, you know that data models are just POCOs. We're going to create a new POCO in our project called RequestHeaders. It won't inherit from anything, and for simplicity, it can live in the root namespace of the project (for my project, that would be header_parser, but yours may be different).
If you look back at the project requirements in the introduction to the Request Header Parser Microservice, you will see that the API needs to return a JSON object with three keys, so RequestHeaders should have one auto-implemented string property for each of those keys: IpAddress, Software, and Language.
// RequestHeaders.cs

namespace header_parser
{
	public class RequestHeaders
	{
		public string IpAddress { get; set; }
		public string Software { get; set; }
		public string Language { get; set; }
	}
}
Returning JSON from the microservice
Now that we have a data model to represent the JSON, we need to copy our header values into an instance of the data model. Simply set each property of the RequestHeaders class to the corresponding header value after the end of the first if block inside the app.Run callback:
if (!context.Request.Headers.TryGetValue("User-Agent", out var software) ||
    !context.Request.Headers.TryGetValue("X-Forwarded-For", out var ipAddress) ||
    !context.Request.Headers.TryGetValue("Accept-Language", out var language))
{
    context.Response.StatusCode = 400;
    await context.Response.WriteAsync("<h1>Bad request</h1>");
    return;
}

var headers = new RequestHeaders
{
    IpAddress = ipAddress,
    Language = language,
    Software = software
};
Now we need to convert our data model to JSON in the response. To do that, we will use the JsonConverter.Serialize() method, and to use that, we will need to add using System.Text.Json to the top of Startup.cs. JsonConverter.Serialize() can work with just an instance of the object to serialize, so just pass JsonSerializer.Serialize(headers) in as the argument to HttpResponse.WriteAsync():
context.Response.Headers.Add("X-Application-Purpose", "FreeCodeCamp Request Header Parser Microservice");
context.Response.ContentType = "text/html";
context.Response.StatusCode = 200;
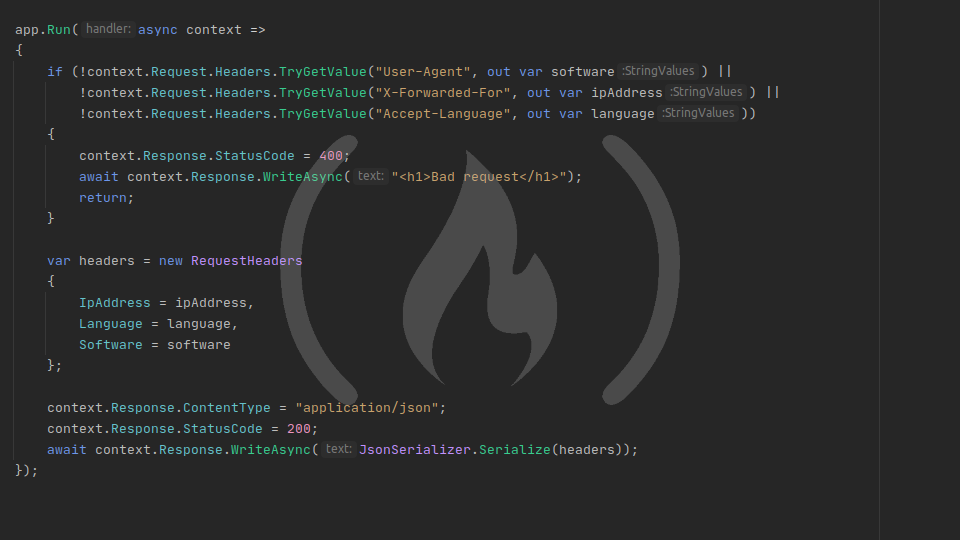
await context.Response.WriteAsync(JsonSerializer.Serialize(headers));Before we run this, we can make a couple more small changes. Firstly, delete the line that adds the X-Application-Purpose header because that was just a demonstration. Secondly, our response is no longer HTML - now it's JSON, and the correct MIME type for JSON is application/json, so go ahead and update the HttpResponse.ContentType as well. Your Startup.cs file should look like this:
using System.Text.Json;
using Microsoft.AspNetCore.Builder;
using Microsoft.AspNetCore.Hosting;
using Microsoft.AspNetCore.Http;
using Microsoft.Extensions.Hosting;

namespace header_parser
{
	public class Startup
	{
		// This method gets called by the runtime. Use this method to configure the HTTP request pipeline.
		public void Configure(IApplicationBuilder app, IWebHostEnvironment env)
		{
			if (env.IsDevelopment())
			{
				app.UseDeveloperExceptionPage();
			}

			app.Run(async context =>
			{
				if (!context.Request.Headers.TryGetValue("User-Agent", out var software) ||
					!context.Request.Headers.TryGetValue("X-Forwarded-For", out var ipAddress) ||
					!context.Request.Headers.TryGetValue("Accept-Language", out var language))
				{
					context.Response.StatusCode = 400;
					await context.Response.WriteAsync("<h1>Bad request</h1>");
					return;
				}

				var headers = new RequestHeaders
				{
					IpAddress = ipAddress,
					Language = language,
					Software = software
				};

				context.Response.ContentType = "application/json";
				context.Response.StatusCode = 200;
				await context.Response.WriteAsync(JsonSerializer.Serialize(headers));
			});
		}
	}
}
Now you can run the project and make sure that it works. Once the project is running, switch over to Postman and spin up a new request to localhost:5000. Be sure that the X-Forwarded-For, Accept-Language, and User-Agent headers all have values, and send your request. It should run fine and your response should look a lot like this:
{
    "IpAddress": "12.34.56.78",
    "Software": "PostmanRuntime/7.26.8",
    "Language": "en-US"
}
You may think we're ready to upload our microservice and test it, but not yet! The JSON returned by the microservice isn't quite right because the casing is wrong - our JSON is in Pascal case, but the keys that FreeCodeCamp expects are all lowercase.
Changing the JSON output
There are a number of ways to change the JSON created by a POCO. When we learn how to use ASP.NET controllers in a later part of the series, we will see that ASP.NET can actually convert your POCO to JSON automatically, in a standardized way. But a simple app using app.Run() doesn't get that benefit, so we have to use a different method.
The simplest method supported by ASP.NET Core 3.1 is the JsonPropertyNameAttribute. Open RequestHeaders.cs, and at the top of the file, add using System.Text.Json.Serialization, then add [JsonPropertyName("<output_name>")] before each auto-property, replacing <output_name> with the name each property should take in the JSON output. Your final RequestHeaders.cs file should look like this:
using System.Text.Json.Serialization;

namespace header_parser
{
	public class RequestHeaders
	{
		[JsonPropertyName("ipaddress")]
		public string IpAddress { get; set; }

		[JsonPropertyName("software")]
		public string Software { get; set; }

		[JsonPropertyName("language")]
		public string Language { get; set; }
	}
}
Give that a run and re-run your request from Postman. Your response should now look something like this:
{
    "ipaddress": "12.34.56.78",
    "software": "PostmanRuntime/7.26.8",
    "language": "en-US"
}
Now, there's only one more thing we need to do before we can upload our microservice.
Adding CORS support
By default, your web browser only allows you to request files from the same domain as the website you're visiting. Web browsers have a protocol called Cross Origin Resource Sharing which they use to let servers say whether a resource should be available from different domains.
When you go to submit the microservice to FreeCodeCamp, you will be at www.freecodecamp.org, but your microservice will be hosted elsewhere, probably at an IP address such as 12.34.56.78. Browsers consider that a cross-origin request, and your browser will ask the target server to verify that it's okay with receiving a cross-origin request. So your app has to add specific response headers to signal to browsers that it's okay with a cross-origin request. If you don't do this, FreeCodeCamp won't be able to test your microservice at all.
To add CORS support to your application, you need to make three changes to your code. Firstly, add using Microsoft.Extensions.DependencyInjection to your using statements. Secondly, add the following method to the Startup class:
public void ConfigureServices(IServiceCollection services)
{
    services.AddCors(options =>
    {
        options.AddPolicy("AllowAll", policy =>
        {
            policy.AllowAnyOrigin();
            policy.AllowAnyMethod();
            policy.AllowAnyHeader();
        });
    });
}
You might recognize that as the ConfigureServices method we deleted in the first lesson. Well, we need to add it back because CORS is a service. This code calls services.AddCors(), which receives a delegate as its only argument. That delegate receives a CorsOptions object, called options here. Inside the delegate body, we call options.AddPolicy(), which accepts two arguments: a policy name, "AllowAll" in our case (we can call this anything we like, but it's best to make it descriptive), and another delegate. The options.AddPolicy() delegate receives a CorsPolicyBuilder object, called policy here. Within the options.AddPolicy() delegate, we tell the policy to allow any domain to access our app, to allow any HTTP request method from outside sources, and to allow any request header from outside sources. You probably wouldn't add these rules to a production app - usually, you only give CORS access to the bare minimum it needs for your app to function. But for now, let's just allow everything, and in later apps we can pare this back to be more restrictive.
Now that we have a CORS policy added to our app, we need to tell our app to use that policy. So thirdly, add this line below your if (env.IsDevelopment()) {...} section of the Configure() method:
app.UseCors("AllowAll");This line simply tells your app to use CORS settings, and it tells it to use the policy named "AllowAll" (which is what we named our policy inside ConfigureServices()). Once this is in place, FreeCodeCamp will be able to query your application.
Now, you're ready to upload your microservice to the web and give it a test!